Sous Vide Duck Breast with Orange Sauce, Scalloped potatoes and Asparagus

Image

So i have made a few attempts with the sous vide and it definitely takes some research on how to properly cook whatever you decide. I highly recommend downloading the Apps available from Polyscience. Their app is very informative and useful it breaks down the science of how the sous vide works and gives you times and temperatures for many varieties of proteins and vegetables. It is a hugely useful tool for all your sous vide needs.

My dish this time around worked very well thanks to polyscience app for iPad and tablet.

What you will need

Duck Breast Marinade

Image

  • 2 Duck Breasts Skin on and deboned
  • 1 Tbsp Ginger grated
  • 1 Tbsp Garlic Mashed
  • Splash of Soya Sauce
  • 1/4 cup Duck Fat, lard will work but duck fat is ALWAYS better.

Image

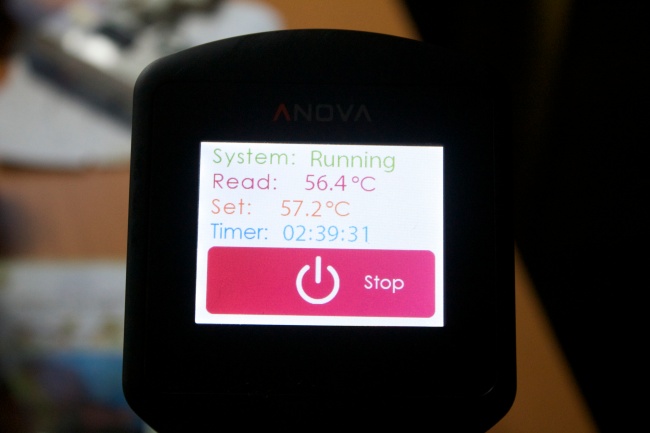
Score the skin on the duck breast in a cross hatch pattern and seal all the above ingredients into a vacuum bag that will allow the duck breasts to have a little space between them, program your circulator to 57.2C. Allow the water to heat up appropriately and keep the bath covered to prevent water and heat loss. Once the water is fully up to temperature place your vacuum bag so that it is fully submerged in the water, you can use a metal pan or something similar to weigh it down if you need too. Keep the duck in the bath for a minima of 45 minutes or whatever the app says for the dimensions of your duck breast. This is the interesting part, the duck will slowly cook to a perfect medium rare. If you allow the breast to remain in the bath for 2:45 the breasts will remain at a medium rare, the will also pasteurize, this is good because it kills all the bacteria making the food safe to eat. The other thing that happens is that the longer the duck stays in the water bath the more the elastic and collagen fibres in the tissue breakdown. This makes the duck breast extremely tender.

After the allotted time, remove your duck breast from the water bath and remove from the vacuum bag, reserve the liquid that is remaining in the bag. Heat a sauté pan over medium heat, and cook the liquid until it has reduced and all the myoglobin(the red stuff) has browned. Pour into your sauce, recipe is further down.

Image

In the same sauté pan heat again over medium heat and add the duck breast skin side down. The longer you let this sit the more the fat beneath the skin will be rendered making it much more palatable. Allow the skin to get to a deep crispy golden brown. Remove the breast from the pan and allow to rest for at least 10 minutes before slicing and serving.

Orange Sauce

Image

  • 1 1/2 cups orange juice or 1/2 cup orange concentrate
  • 3 Tbsp Brown Sugar
  • 1/4 cup White wine vinegar
  • 1 Bay leaf
  • Reserved liquid from vacuum bag
  • Salt to taste
  • Cornstarch slurry

Bring all ingredients to a boil taste and adjust as necessary, Add cornstarch slurry to thicken, make sure the sauce is boiling to get the best thickening power out of your slurry.

Scaloppine Red Potatoes

Image

  • 1/2 Yellow Onion
  • 2 large Red Potatoes washed
  • 2 Cloves Garlic mashed
  • 2 Cups Milk
  • 1/4 Cup Parmesan Cheese
  • Salt to Taste
  • 2 Tbsp Grape Seed or Olive oil

Heat pan over medium high heat and add oil, slice onion into julienne strips and sauté to caramelize. Slice potato, with skin on, as thinly as possible 1-2mm thick or use a mandolin. When onion is caramelized add potato and garlic. Stir to blend for about a minute, or until the garlic begins to smell sweeter. Add the milk ensuring it covers the potato, if you need more add more. Simmer over low heat until potato is done add salt and pepper to taste.

Asparagus

Image

  • Asparagus
  • 2 Tbsp Butter
  • Parmesan to taste
  • Salt to taste

Cut Asparagus into bite size pieces, if you have thicker stacks peel the skin from the asparagus with a vegetable peeler. Melt the butter in a small sauté pan, and when bubbling add asparagus, cook until ends become crispy sprinkle with parmesan and add salt to taste.

Image

Open Faced Scallop Ceviche Sandwich and Scallop Ceviche Platter

ImageImage

Hey Everyone,

This was another school project of mine, we were tasked to make an open faced sandwich of our own design. I chose to do a scallop ceviche sandwich. I happened to have a lot of extra scallops so I made a ceviche platter for my class to enjoy as well. I received a 95% on this project so I thought I would share it with you.


Ceviche Sandwich
For the marinade:
  • 4-6 Large Divers Scallops
  • 3 Oranges
  • 2 Lemons
  • 2 Limes
  • Honey to taste
  • Salt to taste

Thaw and slice your scallops into thin slices about the thickness of a quarter and set aside. Juice the fruit into a pan large enough to lay all your cut scallops out without overlapping them. Taste the marinade and add honey and salt to balance the flavour. Once satisfied with the flavour add your raw scallops to the marinade. Ensure none of them overlap and all are completely covered by the liquid. Set in refrigerator for 2-4 hours to marinate.

For the Sandwich:

  • Bread of your choosing I used white baguette.
  • 1/2 cup Butter
  • 4 rings Jalapeño Chili pepper
  • 2 cloves Garlic
  • 1/2 cup sour cream
  • Red artisan lettuce
  • 1 Roma Tomato
  • 1 Avocado
  • Scallop Ceviche
  • Kolrabi Micro greens

To make the butter place your garlic and jalapeño into a food processor with the butter and sour cream. Pulse until a uniform mixture is made. Cut your bread on a bias of about 45° and spread with the jalapeño garlic butter. Toast in the oven on a sheet tray at 350°F until the crostini’s are nicely golden brown and crispy. 

Finely dice your roma tomato and cut the avocado into strips. Lay your lettuce on the bread first followed by the diced tomato and then 1 or 2 slices of avocado. Remove the scallops from the marinade and pat dry. Shingle them onto the sandwich and top with micro greens.

Enjoy with someone you love.

For the Ceviche platter:

Use the same scallop ceviche, and finely dice some roma tomatoes avocado and cucumber lightly dress with a light garlic olive oil and serve with the ceviche. I put them both on the same plate so you could take a spoon of everything and put it onto a crostini to enjoy.


Sous Vide Cooking

Ok so I am super excited about this. A company called Anova Culinary has agreed to let me try out their sous vide machine. The best part is that it arrived by courier today!!!!! I am going to be doing some blogging about what sous vide is and coming up with some of my own recipes for you to try out if interested. 

What I want you to know is that this will be some advertising on my part as I get free use of the machine as long as I blog about it. Now for the reasons I went for it. As far as circulating pumps go. This is probably one of the easiest to use. It is one of the best price points and it is constructed very well. It can be used commercially or for home and I personally believe is well worth the $199 US Price point. 

Sous Vide is a method that cooks food under vacuum in a water bath that is maintained at a constant temperature of your choosing. The Anova machine is designed to be accurate and hold up to a 22L bath at a temperature plus or minus 0.01 degrees C, and so long as you follow the instructions it works. 

This method for cooking is great for home use because it produces probably the healthiest foods possible, cooks meats and vegetables to the exact right temperature for however you like your food to be cooked, and retains moisture and nutrients that would otherwise be lost to evaporation or cooked away. I love this method of cooking and can’t wait to get started. Now to find the time….


Check out Anova’s Page here

Pear and Blue Cheese Salad with candied almonds

Pear and Blue Cheese Salad with candied almonds

Hey Everyone,

So its been awhile since I blogged and I apologize to those of you that actually follow me. School has been crazy busy, and I am doing well. Because I am doing well I keep getting cool opportunities to work special events and that is taking away from time I could be blogging.

Anyway on too the dish. I was tasked with making an appetizer salad for my cold foods class with Chef Andrew Hewson. This dish is quite involved but I promise you it is worth it. I received a 95% on the project, the only thing I can really recommend is that you be careful with the cloves and ensure to balance your vinaigrette.

I chose to make a modern take on the classic pear and gorgonzola salad. This is what I came up with.

Champagne Vinagrette.

2Tsp Champagne Vinegar
1/2Tsp Pear Balsamic Vinegar
1 Egg
1Tbls Dijon Mustard
Salt and Pepper to Taste
Grape Seed oil to taste ~ 200 ml

Mix the vinegars egg and mustard together in a medium sized bowl. Once a uniform mix has been achieved add the oil in a slow steady stream, as slow a stream as possible, and whisk like you have never whisked before. Adding the oil slower will make the final emulsion better and last longer. The egg will help to stabilize the emulsion and let it las longer too, you can omit the egg but the stability of your emulsion will be considerably shorter.

Pickled Pear
1/2 Boscu Pear/person peeled
Pear Balsamic Vinegar(I got mine at Oil and Vinegar)

Cut pears into desired shape and place in vacuum bag, put 1tsp per full pear of the balsamic into the bag. Vacuum the air out and seal the bag until the pears have a uniform colour throughout. Allow to pickle for 1-2hrs. Open bag and separate excess liquid from pears. Store until ready to use.

Candied Almonds

1/2 tsp cloves
1/2 cup brown sugar
1 Tbls Salt
1 Egg White

Combine the clove, salt and brown sugar together and mix to even distribution. Beat the egg white in a separate bowl until it is light and foamy but not quite a meringue. Toss the almonds in the egg white to coat and then in the sugar mixture. place on a baking sheet and bake in an oven at 350F until the sugar caramelizes around the almonds. take out and cool. To make an almond nougat grind a few of the nuts in a food processor until a very fine powder is made. Chop some into a course chop to top the salad.

Blue Cheese Gelatin

300 mL Heavy Cream
5 oz Blue Cheese (your choice on variety)
Salt to taste
3 Sheets of Gelatin (Gold 200 Bloom Strength)
4oz Green Peppercorns

Bloom your gelatine in a separate bowl in cold water. Line a 6×8 inch mold pan with plastic wrap. Crush the green peppercorns into a paste and place in the bottom of the mold pan. Place cream in a heavy pot and warm to a light simmer over medium heat. Add cheese and melt into cream. Add salt to taste. Once gelatine is bloomed, dissolve it into the cheese mixture and pour into mold. Chill and let set overnight.

Salad Greens
Watercress 1 handful per person no stems
Baby Romaine 1 head perp person trimmed and cleaned

Rip greens into bite sized pieces. Toss in 2 roughly 2 tsp’s of vinaigrette per person. Cut cheese gelatine into desired shapes and sizes and place on plate place dressed greens on top of cheese. Add pickled pears cut into desired shapes. Top with chopped candied almonds.

Hollandaise Sauce

I am still tweaking this so lets not post until I know what I am looking for.

Ingredients:

2 egg yolks

1/4 tsp cayenne pepper

1 1/2 tsp dijon mustard

3 T lemon juice

6 T butter or margarine, melted

Method:

Combine egg yolks, cayenne, dijon, and lemon juice in a blender. Mix well on ____, scraping down the sides periodically. With blender running on low, add butter and blend until sauce turns a light yellow and becomes thick. Simple as that, all done.

Home made Fettucini in Alfredo sauce with mushrooms and pulled chicken.

So I got a new toy for my birthday. I am super excited about it, verging on being super annoying to my wife. I love her dearly, and she has the patience of 15 saints when having to deal with me being excited about anything. The new toy is a Marcato Atlas pasta machine, I have five attachments and am looking forward to playing with them all. The first thing we made as an experiment was Fettucini. When making home made pasta I really do suggest searching out Italian recipes. Really do make sure that you use fresh ingredients and find good quality semolina or Durum flour they are the same thing.

Pasta

250g white flour
250g semolina or durum flour
5 eggs
1 oz water

Put flours in a bowl and make a well. Add eggs to the well and blend well with a fork. Once eggs are incorporated begin kneading with hands, add water or white flour as needed to make the dough the right consistency. The dough should not stick to your hands but should not be too dry.

If using a pasta machine you want get the dough to a thickness of about .5mm which on the marcato is a setting of 5. Cut your pasta to the specs of your machine or by hand however you want to do it!

Cook the pasta in bling salted water for 2-4 minutes depending on how thick you get your dough. Thicker dough will take longer.

Alfredo sauce.

I used Giada Delaurentis’s Alfredo recipe and added shredded chicken and mushrooms to make it a meal. I also made it a little less fatty by changing the cream to 1% milk and the butter to margarine. The sauce came out amazing and everything was delicious.

Sauce

2 1/2 cups milk separated
1/2 cup lemon juice
3/4 cup margarine
1/2 cup Parmesan cheese
Salt
Pepper preferably white
Pinch of nutmeg
Mushrooms
1 cup shredded pre cooked chicken
Fresh parsley

Pour two cups of milk and lemon juice into a large heavy saucepan and heat over medium heat. Add margarine and stir until melted. Add cheese and remaining milk to pan and stir constantly. Allow to reduce a little to thicken sauce. Add mushrooms, chicken and spices and heat until sauce is desired consistency.

Add noodles and stir to coat, serve in pasta bowls and garnish with fresh parsley.

Enjoy

Gnocchi with Marinara Sauce

Surprisingly easy to make, and just as delicious to eat. When you make your own dough, you can freeze some for later and have fresh gnocchi again a whole lot easier the second time. The key to making gnocchi is the mashing of the potatoes; I bought a $40 ricer specifically for this, and it works great. There are more expensive ones, but for beginner ‘ricers’, this one works just fine. A ricer is basically a big giant garlic press; it gives you mashed potatoes with no lumps! I love this thing, I use it for just mashed potatoes now too, and there are 100’s of other uses to discover. I highly recommend the purchase of a ricer!

There are a couple varieties of gnocchi but this is probably the simplest to make. This is the potato variety, and the sauce was a simple marinara sauce that was delicious. The original recipe can be found here at Bev Cooks

Gnocchi

Ingredients:

2-3 russet potatoes

1 egg

1 1/2 cup flour

Large pinch of salt

Method:

Wash and peel your potatoes then cut them up; the smaller they are, the faster they cook. Boil them until tender, or a fork easily passes through them. Drain the water, and using a ricer, mash your potatoes. If you don’t have a ricer I recommend using a hand mixer and passing them through a sieve, but if all you have is a potato masher, you’ll get a great arm workout! These other methods are a bit more time consuming, but just as effective at removing lumps. Place flour and potatoes on a clean work surface and make a well. Crack the egg into the well and add the salt. Start mixing with a fork, or your hands if you don’t mind getting messy, and mix until well combined. The dough will be smooth & elastic-y. Add more flour if the mixture is too sticky. Take chunks of dough and using your hand, roll into a long thin strip, about 1/2″ thick. Cut with a knife into desired size, about 1/2″ wide again. Dust with flour to prevent sticking to one another.

Bring a large pot of salted boiling water to a boil and cook your gnocchi in batches. When the gnocchi is ready it will float to the surface; using a slotted spoon or a spider spoon, remove from water. If you like a crispy outside like me, add to some butter in a satay pan and crisp up the outsides to a nice golden brown. Serve hot!!

Marinara

Ingredients:

5-6 fresh tomatoes, I used vine ripened but whatever variety is your favourite will be fine. I might suggest heirloom or roma as they tend to be the most flavourful.

3 cloves garlic, sliced

4 T olive oil, divided

coarse salt and freshly ground black pepper

Fresh basil

Parmesan cheese

Preheat your oven to 400F. Cut your tomatoes into quarters and toss with garlic, salt, pepper, and 2 T of olive oil. Place on baking sheet and bake for 20-25 minutes, until skins are blistered and cracked. Remove skins and mash in a large pot. Add 1/2 cup chopped fresh basil. Let simmer over medium low heat stirring frequently and reduce to desired thickness. Add gnocchi to sauce first??? Pour sauce over gnocchi, garnish with a few basil leaves and parmesan cheese, and serve!

Key Lime Cheesecake

IMG_7885

Who doesn’t love a good, delicious, light, and fluffy cheesecake? We recently had a friend over for a four course meal, she’s a bit of a foodie and has been wanting to come over for dinner for awhile so we finally found a time that worked. Also so we could watch the finale of Top Chef Canada. For dinner we had home made Dynamite Shrimp Rolls, homemade Gnocchi with Roasted Tomato Marinara Sauce, and Slammin’ Salmon Sliders on Asiago Cheese Puffs with roasted vegetables. Dessert was this delightfully soft, smooth, creamy, and wonderfully light Key Lime Cheesecake!

I have been making cheesecakes for awhile, and have been trying to figure my oven out so that they are 100% cooked but not over cooked. I am very happy to say that this cheesecake was the first to come out perfectly. The original recipe can be found here at Sweet Little Details Blog.

What I discovered for cooking times and temperatures for cheesecake, is pretty simple; like BBQ’ing low and slow is ideal. Flavour wise, this cheesecake was amazing too; it had such a zing of lime and the smoothness that I always look for in a key lime  pie. The balance of the coconut graham crust was delicious. I even made a sauce that added a bit of colour and some pucker factor. So here is the recipe for you to try.

IMG_7800

Ingredients:

1/2 cup butter or margarine (melted)

2 cups graham crackers

1 cup unsweetend flaked coconut

3 (8 oz) packages of light cream cheese, softened

1/2 cup sugar

400ml or 14 oz sweetened condensed milk

3/4 cup fresh lime juice, (key limes are best but larger limes are fine; about 6 normal limes)

Zest of 4 limes

3 large eggs

whipped cream, toasted coconut and limes for garnishing

3-4 cups of boiling water for water bath.

Method:

Preheat your oven to 300F. Using a stand mixer, beat the cream cheese on medium high until light and fluffy. Add the sugar and continue to beat until well combined. Scrape down the sides of the bowl and the bottom of the bowl often to make sure everything gets mixed in. Gradually beat in the sweetened condensed milk on low, stopping every so often to scrape down the sides of the bowl. Continue beating until mixture is smooth and there are no lumps of cheese. Add lime juice and zest and mix well. Add eggs 1 at a time until everything is incorporated. Continue to beat on medium speed while you prepare the crust.

Combine the butter, graham crumbs, and coconut in a bowl and mix until they look like wet sand. Press firmly into the bottom of a 9″ spring-form pan. Once the crust is prepared stop your mixer and pour the cheesecake mixture into the prepared pan.

I like to place my cheesecakes into a water bath to help keep them moist, and prevent cracking, so what I did here was place the springform pan on top of 2 chopsticks on a large baking sheet with 1″ walls. Pour the boiling water into the baking sheet. Your spring-form pan should be resting in the bath but not touching the cooking sheet. Place the whole thing into your oven. Cook for 1 hour or until centre is set. Once your time is up, turn off the oven, take the water bath out and place the cheesecake directly on the oven rack allowing to cool with the oven door slightly open. Cool until you can touch the pan with bare hands, about an hour or so. Take the cheesecake out of the oven and run a sharp knife around the edge and remove the spring form. Chill, covered, in the refrigerator until ready to garnish and serve.

Lime Sauce:

You can add this for a deeper green colour to accent your cheesecake and to add some pucker power for those of you that like a bit of sour.

Ingredients:

1/3 cup lime juice

2/3 cup sugar

1/4 cup water

3 drops green food colouring(optional)

Method:

Combine the ingredients in a medium saucepan over medium heat, continue to cook until bubbling exuberantly. Allow to reduce and concentrate the flavour until desired thickness is reached. Taste using a metal spoon and allow to cool for at least a minute before you try it. Adjust flavour with lime juice and sugar until your happy.

Hope you enjoy this wonderful dessert!!

Whiskey Sour

Ahh! The whiskey sour; delicious, refreshing and oh so very easy. Typically served with lemon or lime cordial, and Rye whiskey, shaken vigorously over ice. Loved but forgotten by many.

Here is my modified version for you to enjoy.

Ingredients:

2 oz rye whiskey
2 oz lime cordial
1/4 tsp sugar
1 T lemon juice
1/2 oz peach schnapps

Build:

Fill a shaker tin with ice, add ingredients in order listed. Shake vigorously for about a minute, to ensure the sugar is dissolved. Pour through a strainer into a tall 3 oz glass like a champagne flute, garnish with a wheel of orange or a maraschino cherry.

Enjoy enthusiastically and responsibly!

Thin Crust Pizza Dough

There are so many pizza dough recipes on the internet it’s kinda ridiculous, but this recipe is the one that I have doctored to get what is my current favourite pizza dough. You can make this one a couple hours before you need it. Or you can let it slow rise in the fridge overnight. Either way it gives a nice thin crust which makes an amazing vessel for transporting pizza goodness to your highly refined pizza eating palates. There are so many choices when it comes to toppings too, so don’t be afraid to let your imagination run wild. Anyway enough gibber jabber. Here is the recipe.

Ingredients:

1 cup hot water
1 1/2 tsp sugar
2 tsp or one package yeast (I prefer traditional)
3 cups flour
2 T olive oil
1 tsp salt, preferably coarse salt

Method:

Pour the water, yeast, and sugar into a large bowl or the bowl of a stand mixer, and give it a stir. Let it sit for a couple minutes, until the yeast is activated. Once activated, add the remaining ingredients and mix with a dough hook or by hand.

When everything is combined into a ball, take out of the bowl and knead by hand until very smooth. Let rise in a warm dark place for about 1.5 hrs or until dough ball has doubled in size. Remove from bowl and roll out and stretch into desired pizza shape. Not circular tastes just as good as circular. Cover with desired toppings and bake at 450F until everything melts into golden brown deliciousness.

20130626-113251.jpg

20130626-113259.jpg

20130626-113307.jpg